Creating a detailed map of India with states requires careful planning and precision. Begin by sketching an outline of India’s shape. Then, research the boundaries and locations of each state. Use a map reference or online resources to accurately draw the state borders. Label each state with its name. Add additional details like rivers and major cities to enhance the map. Finally, carefully color each state with different shades to differentiate them. With patience and attention to detail, your India map with states will come to life!
If you’ve ever wondered how to accurately draw a map of India with its states, you’re not alone. Creating an accurate representation of India’s vast territory and its states can be a daunting task, but with the right guidance, it can be accomplished with ease. So, let’s dive into the fascinating world of cartography and explore the steps to draw an India map with states.
To draw the map of India with states, it is essential to understand the rich history and diversity of the country. India, located in South Asia, is the seventh-largest country by land area in the world and is home to 28 states and 8 Union territories. Its borders stretch over 15,000 kilometers, making it a fascinating subject for cartographers. With a population of over 1.3 billion people, India boasts a splendid mix of cultures, languages, and traditions, which is beautifully reflected in its states. By studying the geography and acquiring accurate information about the shapes and locations of the states, you can create a visually appealing and informative map of India. Start by outlining the basic shape of the country and then fill in the details of each state, taking care to maintain the proper proportions and sizes. With practice and attention to detail, you’ll be able to draw a stunning map of India with its states.
Understanding the Basics of Drawing the India Map With States
Drawing a map of India with its states can be a fun and educational activity. Whether you’re a geography enthusiast, a student, or simply want to brush up on your map-drawing skills, this guide will provide you with the necessary steps to create an accurate and detailed India map.
To begin, you’ll need a few essential tools and materials. These include a blank sheet of paper, a pencil or pen, an eraser, a ruler, and a reference map of India with its states. You can find printable maps online or use an atlas or textbook as a reference.
Before we dive into the process of drawing the India map with states, it’s important to understand the geography of the country. India is located in South Asia and is bordered by the Indian Ocean on the south, the Arabian Sea on the southwest, and the Bay of Bengal on the southeast. It shares land borders with several countries, including Pakistan, China, Nepal, Bhutan, Bangladesh, and Myanmar. India is known for its diverse culture, rich history, and varied landscapes.
Now that you have a basic understanding of the country, let’s move on and see how you can draw the India map with states.
Step 1: Start by Outlining the Shape of India
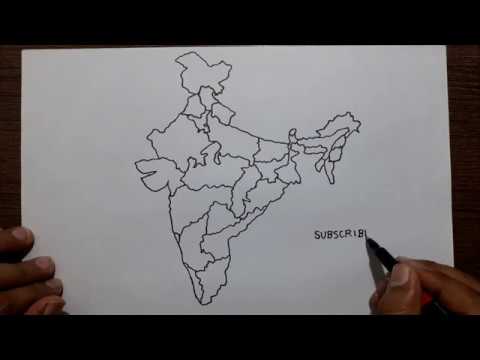
The first step in drawing the India map with states is to outline the shape of the country on your blank sheet of paper. You can use the reference map or a stencil to get the basic shape right. Start by drawing an oval or an elongated shape to represent the main body of India.
Next, add the distinctive Gulf of Kutch in the west and the Gulf of Mannar in the south to accurately depict the Indian subcontinent. These features give India its unique shape.
Make sure to keep the proportions and angles of the outline accurate. You can use a ruler or a straight edge to help you achieve straight lines and right angles.
Once you are satisfied with the outline shape of India, move on to the next step.
Step 2: Divide India into States
Now that you have the basic shape of India, it’s time to draw the state boundaries. India is made up of 28 states and 8 union territories. Each state has its own shape and size, which adds to the diversity of the country.
Referencing your map, start by drawing the larger states first and then move on to the smaller ones. You can divide the states into different regions or clusters to make it easier to draw and label them.
Pay close attention to the shape and proportions of each state. Some states may have irregular shapes or include small enclaves within their borders. Take your time to accurately represent these features.
- Begin drawing the state boundaries from the northwest with Jammu and Kashmir, Himachal Pradesh, Punjab, and Rajasthan.
- Continue with the states in the north and central regions, such as Uttar Pradesh, Madhya Pradesh, and Bihar.
- Add the eastern states like West Bengal, Odisha, and Jharkhand.
- Move to the southern states, including Tamil Nadu, Karnataka, and Kerala.
- Finally, draw the states in the western region, such as Maharashtra, Gujarat, and Goa.
Take breaks in between drawing the states to ensure accuracy and to avoid mistakes. Remember to use a ruler or straight edge for straight lines.
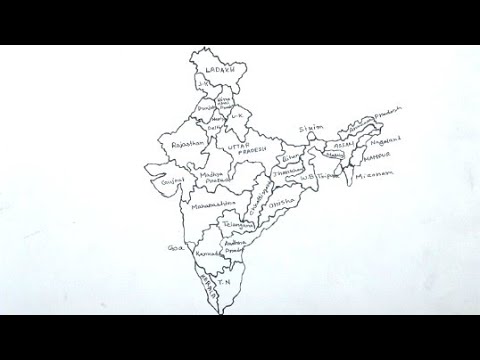
Step 3: Labeling the States and Adding Details
Now that you have the state boundaries drawn, it’s time to add labels and other details to your map. Start by labeling each state with its name. You can write the names neatly inside the respective boundaries.
Use a small and legible font size to ensure that the names are clear and easy to read. You can use capital letters or a combination of upper and lower case letters.
In addition to the state names, you can also add important cities, rivers, and landmarks to your map. This will enhance the level of detail and make your map more informative.
Refer to a geographical map or an atlas to get a sense of the major cities and rivers in each state. Again, take your time and pay attention to accuracy when adding these details.
Step 4: Coloring and Finishing Touches
Once you have added all the necessary details, you can proceed to color your India map. Use colors that are representative of the actual states. For example, you can use light green for agricultural states, blue for coastal states, and brown for desert regions.
Take your time to color each state neatly and avoid overlapping colors. Use colored pencils or markers for better precision and control.
After coloring, you can add a neat border around your map using a ruler. This will give it a finished look.
| Header 1 | Header 2 |
| Row 1, Column 1 | Row 1, Column 2 |
| Row 2, Column 1 | Row 2, Column 2 |
Now you have successfully drawn an India map with its states! Hang it up on your wall, use it for educational purposes, or simply admire your artistic creation.
Remember, practice makes perfect. The more you draw maps, the better you will become at accurately representing geographic features and boundaries. So, grab your tools and embark on your map-drawing journey!
For more detailed instructions and visual guidance on drawing the India map with states, you can refer to this helpful resource.
Frequently Asked Questions
Here are some common questions and answers about drawing the map of India with states.
1. How can I draw the map of India?
To draw the map of India, start by sketching a rough outline of the country’s shape using a pencil. Then, use a map or reference image to add the details of the major features like the coastline, rivers, and mountain ranges. Next, draw the boundaries of the states and label them accordingly. Finally, you can color the map using different shades for the states and add a title to complete your drawing.
Remember to take your time and use light, guiding lines as you work on the details. Practice makes perfect, so don’t be afraid to try different techniques and experiment with your drawing skills!
2. What are the important landmarks to include in the map?
When drawing the map of India, there are several important landmarks you can include to make it more accurate and visually appealing. Some of these landmarks are:
– The Indian Ocean and the Bay of Bengal on the eastern side
– The Arabian Sea on the western side
– The Himalayan mountain range on the northern border
– The major rivers like the Ganges and Yamuna
– Famous cities like New Delhi, Mumbai, Kolkata, Chennai, and more
By including these landmarks, you can create a comprehensive and recognizable map of India.
3. Can I use a map template to draw the map of India?
Yes, using a map template can be a helpful tool when drawing the map of India. You can find printable map templates online or use map-making software to create your own template. The template will provide you with the basic outline and borders of the country, allowing you to focus on adding the details and labeling the states. Using a map template can save you time and ensure that your map is accurately proportioned.
However, it’s important to remember that using a template is just a starting point, and you should still add your own artistic touch to make the map unique.
4. How do I label the states on the map?
To label the states on the map of India, you can use a combination of numbers and names. Start by numbering each state on the map using small, clear numbers. Then, create a corresponding key or legend that lists the numbers and their corresponding state names. Place the key on the map in a prominent but non-intrusive location, such as the bottom or side. This labeling system will make it easier for viewers to identify and understand the states on the map.
Make sure to use legible and consistent font styles for the state names to ensure clarity.
5. How can I add colors to the map of India?
Adding colors to the map of India can bring it to life and make it visually appealing. Here are some tips for adding colors:
– Use different shades of green for the land areas to represent forests and plains.
– Use shades of blue for the water bodies like the Indian Ocean, Bay of Bengal, and Arabian Sea.
– Use lighter shades to indicate higher elevations like the Himalayas and darker shades for lower elevations.
– Select colors that are visually pleasing and harmonious with each other.
Remember to use colors sparingly and strategically to maintain clarity and avoid overwhelming the map with too many bright tones.
To draw the map of India with its states, you’ll need a blank sheet of paper and some colored pencils. Start by drawing the outline of India, including its coastline and neighboring countries. Then, divide the map into states, carefully drawing the shapes and borders of each state. Use different colors to fill in each state, making sure to label them with their names.
Next, add important geographical features such as rivers, mountains, and lakes. You can also include major cities and landmarks. Finally, don’t forget to add a title and a compass rose to indicate the cardinal directions. Take your time, be patient, and enjoy the process of creating your own map of India!